Years of walking through client garages have shown me that garage shelving can turn cluttered chaos into a system that actually works for you. Once you know where every ladder, tool, and seasonal box will live, your garage starts working with you instead of against you. Leave that footage unclaimed and clutter will claim it for you, usually in a way that costs you a parking spot or a workbench.
Your shelving choices affect everything from how quickly you grab a tool to how much floor space stays open for parking or projects. Pick the wrong setup and you'll likely abandon it within a year, watching it sag under weight it was never built to hold. Plan it well and it becomes invisible in the best way, quietly doing its job while you go about your day. That kind of system doesn't happen by accident, and it comes from walking through a handful of factors first.
Before you install garage shelving, let’s walk through these practical factors first:
- Available space and layout
- Weight capacity needs
- Material and durability
- Access and retrieval frequency
- Installation method and wall support
- Budget and long-term value
Each one shapes how well your shelving holds up, so let's go through what actually matters to you.
Available Space and Layout
Garage dimensions vary more than you'd expect, and shelving that fits well in one bay can crowd out everything else in a smaller one. Measure your exact footprint before buying anything so you avoid ordering units that stick out past your parked car or block a walkway. Ceiling height matters just as much as floor space, especially near your garage door track or overhead opener. Ten minutes with a tape measure now saves you plenty of frustration once shelving goes up.
Traffic flow through your garage deserves attention too, especially near doors leading into your house or out to the yard. A garage that looks fine on paper can still create daily friction, something I notice most often near entry points where shelving crowds a door swing. Leave at least three feet of clear walking space so shelving stays useful instead of turning your garage into an obstacle course.
Your vehicles factor into the equation more than most layouts account for, especially in a two-car garage where shelving on one side can crowd a door's swing. Corner units make better use of odd angles than flat runs, filling gaps you'd otherwise leave empty. Plan a few extra feet of clearance around your parked car so shelving doesn't turn parking into a squeeze. Room to grow matters too, since most garages end up storing more over time.
Weight Capacity Needs
Shelf units vary widely in how much weight they're rated to hold, and matching capacity to what you'll actually store prevents sagging shelves and worse. A few categories tend to catch people off guard:
- Power Tool Storage: Your drills, saws, and compressors add up fast in weight even when they look compact on a shelf. Stack several on one mid-tier shelf and you can easily overload a unit not rated for it.
- Seasonal Bin Loads: Holiday decorations and off-season gear often get packed into oversized totes that weigh more than they look. A few full totes on your upper shelves can push a unit past its rated limit fast.
- Automotive Supplies: Oil, coolant, and spare parts carry real weight even in small containers, often collecting near the bottom shelves closest to your workbench. A shelf rated for light storage won't hold up under that.
- Sporting Gear: Bikes, weights, and gear bags stack up quickly along a shelf run built for lighter loads. A shelf meant for boxes alone can buckle fast under your free weights or a stack of dumbbells.
- Paint and Chemicals: Cans of paint, oil, and cleaning chemicals feel light individually but add up fast when grouped on one shelf. Too many liquids on a single level can tip a shelf not rated for that density.
Check the manufacturer's per-shelf weight rating, not just the unit total, before you load anything up. A quick look at that number before you shop saves a shelf from bowing months down the road.
Material and Durability
Your garage swings between damp winters and hot, sticky summers, and whatever material you choose needs to handle both without warping or rusting. Wire and wood grid shelving works fine for light, dry storage but struggles once humidity creeps in during warmer months. Powder-coated steel holds up far better across seasonal swings and resists the kind of corrosion that eventually weakens a frame.
Plastic and resin shelving sidesteps rust entirely, making it a solid pick for anything you store near a garage door where moisture gets in easily. It flexes more under heavy loads though, so it works better for lighter items than engine parts or a dense tool chest. Side-by-side comparisons in client garages taught me the cheapest option almost always shows wear within the first year. Coated steel or heavy-duty resin costs a little more upfront but pays off within two years.
Your fasteners and connectors deserve the same scrutiny as the shelving material itself, since a rusted bracket can bring down an otherwise solid unit. Stainless or zinc-coated hardware resists corrosion far longer than standard steel screws exposed to garage humidity. Coated fasteners cost you very little extra and add years to your shelving system's life.
Access and Retrieval Frequency
How often you use something should drive exactly where it lands on your shelving unit, not just how it fits. A few placement habits make the biggest difference for you:
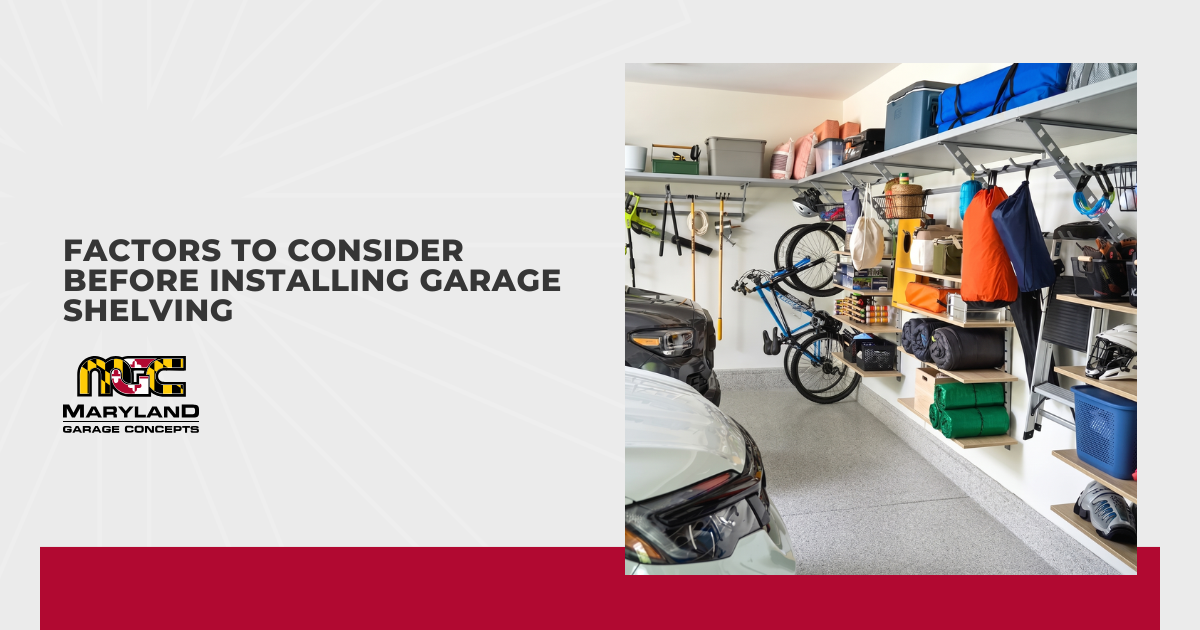
- Daily Reach Zone: Items you use weekly, like cleaning supplies or sports gear, belong on shelves between waist and shoulder height for quick grabbing. Save anything above eye level for things touched only a few times a year.
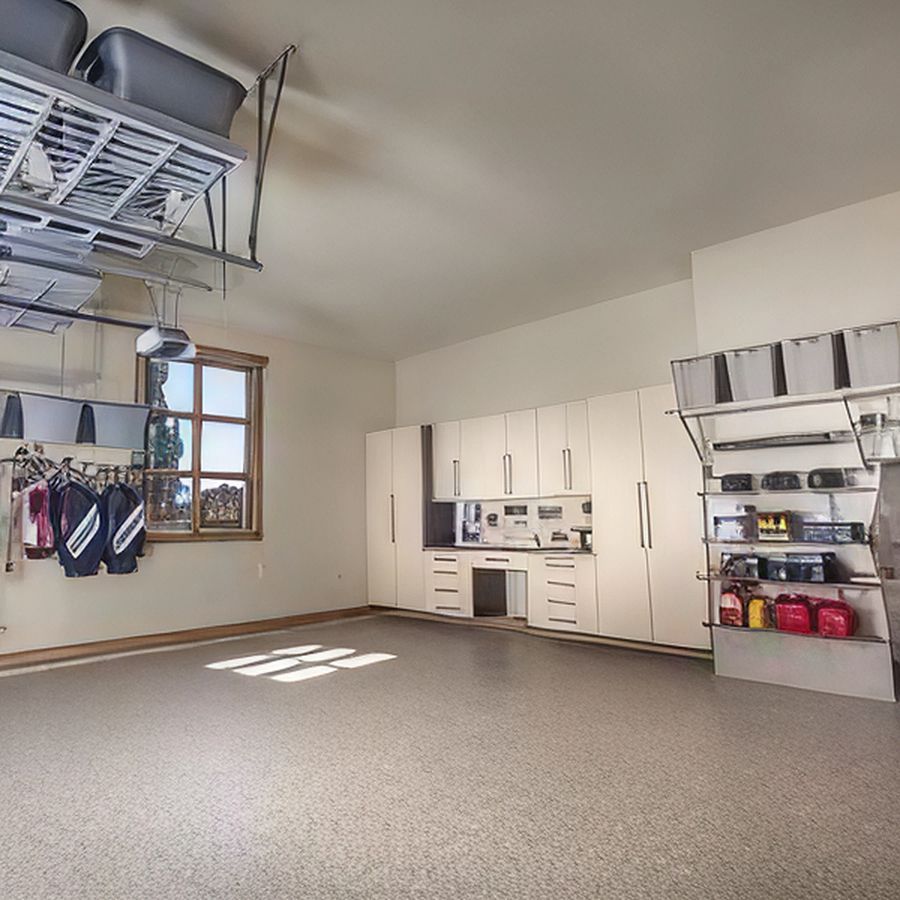
- Overhead Storage: Top shelves work well for lightweight, bulky items like empty coolers or camping gear you only pull out seasonally. Keep heavier boxes lower down so lifting them off doesn't strain your shoulder.
- Ground-Level Access: Bottom shelves suit heavier items you use often, like power tool cases or bins you pull out several times a month. Keeping these low cuts down on the bending you'd otherwise do all week.
- Seasonal Swap Zone: Items that only matter part of the year, like holiday bins or lawn gear, work best on a shelf easy to swap each season. Keeping them within reach saves a stepladder trip every few months.
- Behind Door Storage: Narrow shelving behind your garage door entry suits items you grab on the way out, like a leash, gloves, or a toolbox. Placing daily-use items there saves you a walk across the garage every time.
Sort your shelving this way and simple storage turns into a system that actually saves you time. That kind of setup pays off every single time you walk into the garage looking for something specific.
Installation Method and Wall Support
Your garage walls aren't all built the same, and figuring out what's behind the drywall matters before a single bracket goes up. Wood studs handle most standard shelving brackets without issue, but masonry or metal-frame walls need different anchors entirely. Skip this step and you'll likely see shelving pull loose months later under weight it should have easily supported.
Freestanding units skip the wall-anchoring question entirely and work well if drilling isn't an option for you. They still need a level floor and enough weight distribution to stay stable once loaded, especially if your garage floor slopes toward a drain. Shelving that pulls loose from drywall alone is a repair I've handled more times than anchoring into a stud would ever require. Anchor solidly into studs and pair that with a level base, and your shelving will last instead of pulling loose.
Bracket spacing affects stability just as much as anchor type, and gaps set too far apart let your shelves bow under moderate loads. Most manufacturers list a maximum spacing between brackets, and stretching past that number voids your weight rating. Mark a level line across the wall before you drill so your entire run stays even and looks intentional. One quick level check before the first hole goes in prevents a crooked run that's hard to fix later.
Budget and Long-Term Value
Upfront cost is often the deciding factor for you, but the cheapest shelving option isn't always the cheapest one over time. Lower-priced units usually mean thinner metal, weaker anchors, or connectors that loosen faster under regular use. Replace a sagging or broken unit within a couple of years and you'll often spend more than you would have on sturdier shelving from the start. Warranty coverage and weight ratings tell you more about long-term value than the price tag alone.
Installation cost matters too, whether that means paying for professional mounting or setting aside a weekend to do it yourself. Professional installation typically adds to your upfront price but reduces the risk of anchoring mistakes that show up later as sagging shelves or pulled-out brackets. Weigh both costs against how long you need the system to last, and you'll usually land on the better long-term choice.
Maintenance costs factor into your real price too, since some materials need occasional touch-ups while others need almost none. Powder-coated steel rarely needs anything beyond an occasional wipe-down, while raw metal or untreated wood can need resealing or repainting within a few years. Compare a few quotes before you commit, since prices often vary more than you'd expect for what looks like the same basic shelving unit. Written quotes make it easier to hold your installer to the price and materials promised upfront.
Conclusion
Garage shelving works best for you when it's chosen around your space, your load, and the way you actually use your garage day to day. A setup that ignores weight limits or wall type rarely lasts as long as one you plan around them from the start. The extra time you spend thinking through material, access, and installation pays off every time you pull something off a shelf without a second thought. Long-term organization comes from shelving chosen around these factors, not the lowest price tag in the aisle.